Eng_Lab 05 - Problem-solving laboratory 1
Lab. 05 - Problem-solving laboratory 1 - “Searching robot”

1. Problem-solving laboratories
In a problem-solving laboratory you are given a problem, an issue that requires your own work, searching for solutions and a creative approach.
The outcome of this laboratory does not have to be a solution to the problem. We focus here on possible approaches, on considering what may work and what will not, and what problems we may run into.
The final result is a short report (more at the bottom of the instructions) and optionally a program that solves the problem. The report will be graded like a regular homework assignment, while the implementation can earn up to 5 extra points.
2. Problem
You have a TurtleBot3 robot of the waffle type. The robot operates in an environment with a ready map and can localize itself in it. It is equipped with a laser scanner with a range of 3.5 meters and an RGB camera.
After startup, cubes with ArUco tags (from the ARUCO_ORIGINAL dictionary) are placed in the environment at 5 random points. The points are drawn from free places on the map, keeping a distance from walls, furniture and the other cubes. We assume that the robot does not know the approximate positions of the cubes.
The robot has to search the environment autonomously and find the positions of all 5 cubes together with their IDs.
The task should be implemented as an action whose result is the position of all the cubes.
3. Environment setup
Before you start, prepare the environment: Environment
setup instructions. The image is based on
osrf/ros:jazzy-desktop-full (ROS 2 Jazzy Jalisco) with the
Gazebo Harmonic simulator.
By default the container is named ARM_05.
NOTE! When run, the scripts remove a container with this name before creating a new one.
Using the container
After every computer restart, remember to run:
xhost +local:rootA new terminal can be attached to the container with:
docker exec -it ARM_05 bashROS_DOMAIN_ID
When several computers work in the same local network
(eduroam may require this too), you may need to set the
ROS_DOMAIN_ID environment variable to different values.
Choose any integer from 0 to 100. Set this value in the
~/.bashrc file:
export ROS_DOMAIN_ID=10 # example valueor directly in the terminal (it then applies only to that terminal):
export ROS_DOMAIN_ID=10 # example valueIt is suggested to use the last two digits of the computer’s IP
address as the ROS_DOMAIN_ID value, to avoid conflicts with
other users in the network. To check your IP address, you can use:
ip addr showThe IP address is shown under the network interface,
e.g. wlan0 or eth0.
It may be convenient to add this export to bashrc:
echo 'export ROS_DOMAIN_ID=<chosen_value>' >> ~/.bashrc Gazebo: GZ_IP and GZ_PARTITION
Gazebo communicates independently of ROS 2 (through the
gz-transport library), so ROS_DOMAIN_ID does not
separate simulations. By default, Gazebo connects simulations started by
the same user on computers with the same name (hostname), and a
container started with --network=host takes the computer’s
name and runs as root. If computers in the network have the
same names, simulations of different people can interfere with each
other.
That is why the image sets GZ_IP=127.0.0.1 in the
~/.bashrc file, so Gazebo communicates only within one
computer. In containers created from an older version of the image (the
echo $GZ_IP command prints nothing), add it yourself:
echo 'export GZ_IP=127.0.0.1' >> ~/.bashrcIf several simulations run on one computer (e.g. in several
containers), you can also separate them by setting a different
GZ_PARTITION value in each container (Gazebo nodes only see
each other within the same partition):
echo 'export GZ_PARTITION=<chosen_name>' >> ~/.bashrc # e.g. arm_10The GZ_PARTITION value must be the same in all terminals
where you use Gazebo (starting the simulation, gz
commands), so it is better to set it in ~/.bashrc than in a
single terminal. Changes in ~/.bashrc apply to newly opened
terminals, so restart the simulation after making them.
4. Running the simulation
In this class we will use the TurtleBot3 robot (waffle) again, this
time in the arm_house.world world from the
arm05_sim package. It can be started with
cd /arm_ws
source install/setup.bash
ros2 launch arm05_sim world.launch.py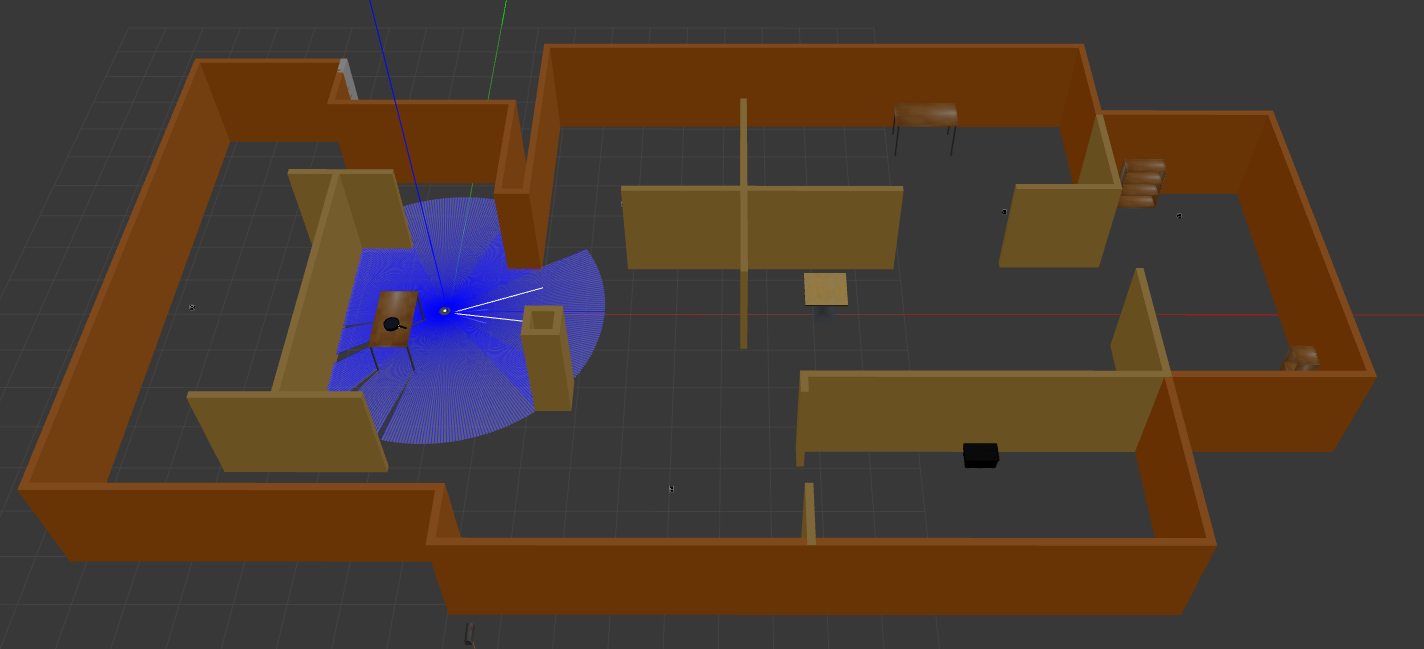
The first start may take a while, so please be patient.
Together with the simulation, the Nav2 navigation stack is started
with a ready map of the environment. AMCL starts with the initial robot
pose at (0, 0), so you can send navigation goals right away, e.g. with
the /navigate_to_pose action or the Nav2 Goal
button in RViz. RViz with the Nav2 configuration can be started in a
separate terminal:
ros2 launch nav2_bringup rviz_launch.py use_sim_time:=trueThe camera image is published on the /camera/image_raw
topic. TurtleBot3 on ROS 2 Jazzy takes
geometry_msgs/msg/TwistStamped messages on the
/cmd_vel topic.
During startup, ArUco cubes (shown below) are spawned at random places. They will be in a different position every time. Each cube has a side of 9 cm.
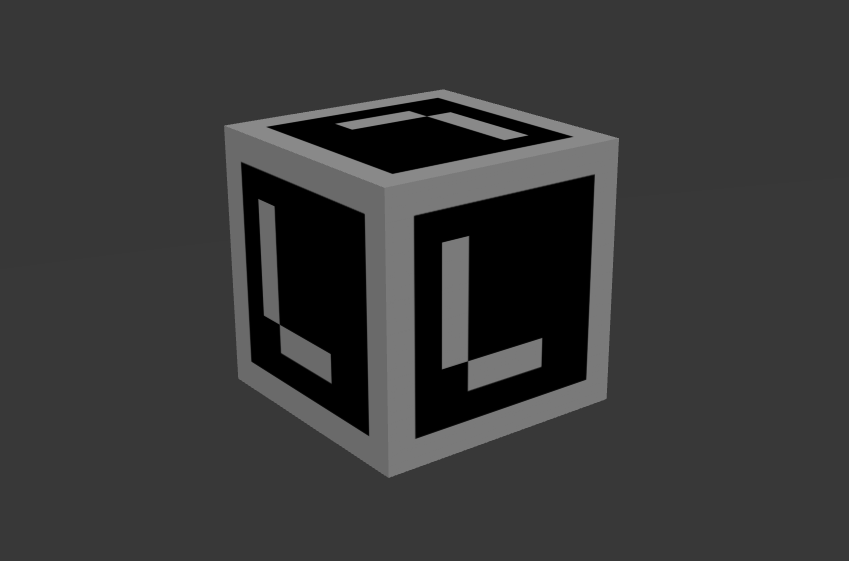
After the simulation starts, the cube positions are saved in the
/root/.ros/arm05_sim/logs folder. The file names are
timestamps, but the latest run is always saved in the
latest.txt file. This way you can check the accuracy of
your proposed system.
5. Independent task
In this class, propose a way to solve the problem described in section 2.
The result should be a report containing the proposed program structure (with the nodes and the topics they will exchange), packages available online that can be used for the task, and a description of potential problems you may run into.
The report should contain the following elements:
- Goal and assumptions - a short description of the problem and the constraints you adopted.
- Strategy - the key steps of the algorithm and the split of responsibilities between nodes.
- Schematics and diagrams - block diagrams, diagrams of data flow between nodes, etc.
- Tools used - libraries, ROS2 packages and other external resources.
- Potential risks - expected difficulties and ways to check for them or work around them.
- Conclusions - a summary and possible directions for further development.
Program
Optionally, you can also prepare a program that carries out the task (with its description in the report). The implementation can earn up to 5 extra points.
Author: Kamil Młodzikowski